fish4london
Member Extraordinaire
Does the Zulus no longer freeze screen on zero function after update for anyone else ?
Thank you, BruceIf you download the latest firmware update, both the vertical and horizontal lines on the mil and moa scaleable reticles are now numbered (previously only the vertical lines were numbered)
If you look at both reticles with the scope at base magnification, the reticle with the highest numbers is the moa reticle
In many hunting situations where there is a wind, there is insufficient time to measure the wind speed and direction, enter the data into a ballistic app and then apply the correction before the potential quarry has moved
The Arken ballistic app is only calculating the point of aim based on elevation, however, if you know the windage in moa or mils, putting the scope into dial in mode and ranging a target will put the centre of the reticle in the correct vertical position and the windage hold can be read directly using the numbers on the horizontal stadia.
That avoids trying to guess an aiming point that is not on either the horizontal or vertical axis of the reticle.
Cheers
Bruce
Wow, thanks Bruce for the time you put into this postOK, here's the rest of the post
Now we know the main parts of a digital scope, lets look at an optical sensor in a bit more detail. Note that thermal sensors work in a completely different way that you'll be pleased to know I'm not going to discuss here
Basically, light hitting the surface of the sensor results in electrons being released from the sensor and it's these electrons which are the basis of the electrical signal used to create the image
The sensors we use in day/night scopes are made up of a large number of individual sensors we call pixels (short for picture element)
You can think of the electrons that result from light hitting the upper surface of a pixel as dropping off the lower surface of the pixel into a bucket (technically, the bucket is called an electron well)
The more electrons there are in the bucket, the bigger the electrical signal used to create the image
However, once the bucket is full, it can't hold any more electrons and it's only the electrons in the bucket that can be used to create the electrical signal that results in the image we see
So, if it's a bright and sunny day, the bucket fills up more quickly than it would if it was dull or dark
The bucket also has a tap which. when turned on allows the electrons to flow out and create the electric current which, in turn is used to produce the image we see on the display
So, we can think of a bucket full of electrons as the level of signal needed for a usable image, and the time taken for the bucket to fill up as the exposure time.
We can think about how often the tap is opened (and then closed) as being the frame rate.
If the bucket can be filled with electrons in less than 1/60 of a second then a frame rate of 60 frames per second can be maintained and there will be no reduction in image quality or brightness
If the bucket takes longer than 1/60 of a second to fill, then the tap is opened less frequently to allow more time for the bucket to fill, then the frame rate is reduced and if it's reduced too far the image becomes laggy and jerky.
In a day/night scope, keeping a usable colour image for as long as possible comes down to getting enough light onto a pixel so that the bucket is just filled with electrons in a time short enough to prevent the image from lagging or appearing jerky
So, how do we get enough light onto a pixel to make that happen.
1. Use a lens with a large diameter
2. Use a sensor with big pixels
3. Use a sensor that better converts the incoming light into electrons
Let's look at each of these in turn
1. Use a lens with a large diameter
Other than in glass scopes where the diameter is specifically stated, lens diameter is usually inferred from the f number of the lens, where the f number is the focal length of the lens divided by the diameter
So, a lens with a focal length of 50mm and an f number of f1.4 would have a diameter of 50/1.4 = 35.7mm
Another lens with a focal length of 50mm but with an f number of 2.4 would have a diameter of 50/2.4= 20.8mm
Because it has the larger diameter, the f1.4 lens will admit more light than the f2.4 lens.
The amount of light entering the lens is proportional to the surface area of the lens.
The f1.4 lens has a surface area of 1001mm², while the f2.4 lens has a surface area of 339mm²
This means that the f1.4 lens admits almost 3 times as much light as the f2.4 lens
That big difference in surface area means nothing in daylight (hence the hole in the lens cap not affecting image brightness) but makes a big difference in low light conditions
2. Use a sensor with big pixels
Bigger pixels present a larger surface area to the incoming light, resulting in more electrons being produced.
Here are some pixel sizes on sensors currently in use and the scopes they are used with
4 microns - Pulsar C50, original HIK Alpex, IRay TD70V2,
2.9 microns - Arken Zulus, PARD DS35 and PARD NV008
2 microns - HIK Alpex 4k,
1.5 microns - ATN XSight 4k, Wulf 4k
All of these are square pixels and the numbers shown are the lengths of the sides, so the surface areas are: 16 micron², 8.41 micron², 4 microns², 2.25microns²
The scopes using 4 micron and 2.9 micron sensors are full HD with 1920x1080 pixel sensors while the 2 micron and 1.5 micron scopes are 4k with around 4000x3000 pixel sensors
Similarly to lens aperture, small pixels are not at any sort of disadvantage in daylight, but are increasingly disadvantaged in low light conditions and typically need more IR to produce a decent NV image.
The choice between using a sensor with relatively few large pixels and a sensor with many small pixels has been at the heart of digital scope design for as long as I can remember, with the trend definitely moving towards sensors with larger numbers of smaller pixels, resulting in higher resolution images and video, but less good NV performance
Using a sensor with lots of large pixels (and they do exist) results in a physically larger sensor - and physically larger sensors need long focal length lenses to produce reasonable levels of magnification - and long focal length lenses need to have large diameters to keep the f number low enough to allow plenty of light to reach the sensor for decent NV performance - and larger diameter lenses with low f numbers are heavier and more expensive, resulting in a larger, heavier and more expensive scope.
Balancing all those competing parameters to produce a scope that performs well. and sells well at a fair price is what scope designers get paid for.
Sometimes they get it right, and sometimes they don't
3. Use a sensor that better converts the incoming light into electrons
Sensor technology continues to improve and the full HD and 4k sensors in use currently, are significantly better at converting light into electrons than they were even 3 or 4 years ago.
How much further they can improve is difficult to say.
However, it should be noted that if a pure NV scope with no colour daylight capability was required, there have been mono sensors available for several years which outperform even the best of the current crop of colour sensors.
Let me explain:
Basically, when light hits a sensor pixel, the pixel doesn't know the colour of that light, there simply exists some probability that the incoming light will result in an electron being produced.
To get a colour image that matches the response of the human eye requires some real "electrotrickery"
The first thing that's done is to fit a UV/IR blocking filter in front of the sensor.
In day mode, this prevents UV and IR from reaching the sensor and screwing up the colours.
When NV mode is selected the filter is moved out of the way (that's the click you hear) thus allowing IR to reach the sensor
There's no UV to speak of at night so it's not a problem for the sensor or the image it produces
The other thing is that all colour sensors have a fixed mask of red, green and blue filters placed directly on top of the sensor so that each pixel only "sees" red light or green light or blue light.
The electronics that processes the signals coming from the sensor knows which colour each pixel responds to and using some pretty horrendous mathematics and clever signal processing can actually convert that mass of different colour information into a usable colour image.
However, placing filters in front of each pixel inevitably reduces the amount of light reaching the pixel, so mono sensors which don't use filters are always going to be more sensitive than colour sensors.
For example, Sony make both colour and mono versions of the sensor used in the Arken Zulus.
The mono version is over 40% more sensitive to light than the colour version
It's not all bad news though, because when a day/night scope is switched into NV mode and although the colour filters in front of each pixel are still there, the complicated maths and signal processing needed to create a colour image is no longer required so more of the signals coming from the senor are available to produce the mono image we see in NV mode resulting in a usable mono image at light levels that could not result in a usable colour image
Until the C50 came along, Pulsar only ever used mono sensors in their NV scopes and even now, their new £5280 Merger Duo NXP50 multispectral binoculars use a 1920x1080 mono sensor - which will make them excellent in darkness and pretty useless in daylight
Cheers
Bruce

 www.first4magnets.com
Don't force the battery cap on, you will over compress the front spring if your 18650 is on the longer side.Thanks for response Bruce, I will try it later this evening with a button top 18650.
Before you try the button top, compare it to the flat tops you are using.Thanks for response Bruce, I will try it later this evening with a button top 18650.
Those numbers and the location of the reticle relative to the LRF marker are fine - don't change anything - just go and shootI’ve just done the new update first go no problem. My X 5 and Y 72 I have shimmed the front to get 72 is that enough or should I shim more or get a 0 mount it’s on BRK Ghost plus the rangefinder box is just left of the reticle
")
Thank you very muchThose numbers and the location of the reticle relative to the LRF marker are fine - don't change anything - just go and shoot
Cheers
Bruce
It can be worse than this. Mine has cut out under recoil right from new. What I found was happening was that it would be ok on a new battery for about 30 shots and then start cutting out. After a lot of frustration I found that the batteries' flat top is concaving in over time from the recoil (.223) until the contact is lost. Ive tried different battery makes and they have all done it. Once the flat top is caved in a magnet spacer hasn't worked. I know of one other Zulus that is doing the same thing. Other wise I really like the scope and have shot a lot of animals (deer) with it. It is a very early production one.The recoil from the rifle has resulted in the battery briefly disconnecting from it's terminals causing the scope to glitch or switch off completely
There are two solutions:
1. Use a button top UNPROTECTED battery (it's the protection bit that makes it too long to fit
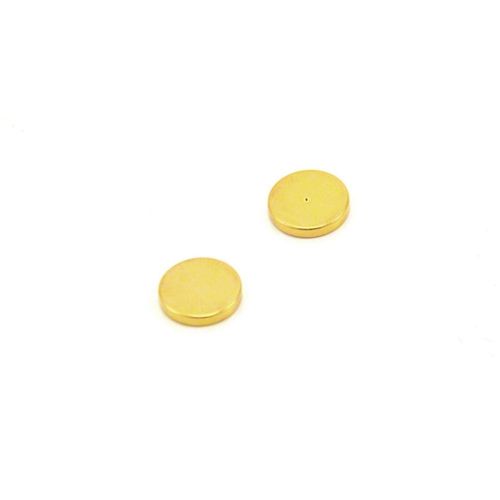
2. Use a 2mm thick disc magnet stuck to the negative end of the battery to effectively increase battery length - one of these will do it
12mm dia x 2mm Gold Magnet w/ Dimple - 1.2kg Pull
Strong, gold-plated neodymium disc magnets with a dimple on the north pole used for therapy purposes and identifying the polarity of other magnets.
Cheers
Bruce
Interesting. I've not tried it with an external IR torch. My internal IR torch seems to work as it should. I'm away for a few days but will try this out when I get back Sunday. Also interested whether the Firmware can reset to the previous one.Does anyone else have issues with exposure (night mode when using IR) after doing the update? Mine is taking about 10 secs to begin to adjust exposure when using external IR going from tight IR beam to wide beam. If I've got a tight bright central IR beam with the scope on low mag, and I adjust the IR beam to wide to fill the field of view, the scope initially is dark but takes about 10 secs or so before it starts to adjust the brightness of the image, and it adjusts brightness in steps, eventually getting a bright enough image to be useable.
My next question is, is it possible to downgrade the firmware? I took a punt and updated, but I think I'm starting to wish I hadn't.
Video after update